A step-by-step overview by Adia Buford
Soooo, I just recently created my FIRST ever narrative short film (my second film altogether) and y’all… it was a process. Spoiler alert tho – it all worked out in the end! Let me give you a brief overview of how the film (“Blue Kalypso” aka “BK”) came to be. I created it as a final project in one of my film classes. I had the idea for BK prior to entering the course, but I hadn’t physically written the script until… 4 days before I had to shoot it. Mind you… the shoot itself was a day and a half before I had to turn in the fully-edited cut… Yea… that’s what I meant by “process”. I’m really putting myself out there right now because this very blog post is being reviewed and graded by the same instructor of the class I created this film for. Hi, Professor. I’ll go into more detail about what all went down with the pre-production/production phases later, but I will share a lesson I learned from this experience- trust in yourself and the ideas you have. If along the way you feel a pivot is necessary, do so promptly and courageously. Now, to the editing process. To start things off, it’d probably be a lil helpful for you to watch the film if you haven’t already lol. You can do so, here.
Step 1 – Visualization
Alright, now that you have a reference point, let’s get into it. So, I did everything myself for this project – the writing, directing, shooting, sound, editing, all me. While this can feel like a lot to handle at times, the advantage is that I was able to begin editing from the jump, before I even had lines written in the script. I’m a huge visualizer and in order for what I write to make sense, I have to first run through it in my mind. I literally play out the entire film before I write. Doing so informs my shooting and makes is that much easier for me in the editing process. I believe that’s one of the reasons why I was able to complete the editing process relatively quickly. It took me about a day with a few breaks in-between to complete each stage of the edit. A good edit can only take bad footage so far, so I made it a point to set myself up for success by planning out my shots and visualizing what I wanted everything to look like in the final edit before I even reached that phase.
Step 2 – Getting Into the Edit
This part is so exciting to me because even though I was physically there shooting everything myself, to see it all come together feels like a big accomplishment. This project was special in that I had so many “firsts”. It was my first time writing, shooting, and directing a narrative film, my first time directing actors, and my first time coordinating with a business so that I could film in their space. I definitely stepped out of my comfort zone with this one and aim to do the same with each film I create moving forward.
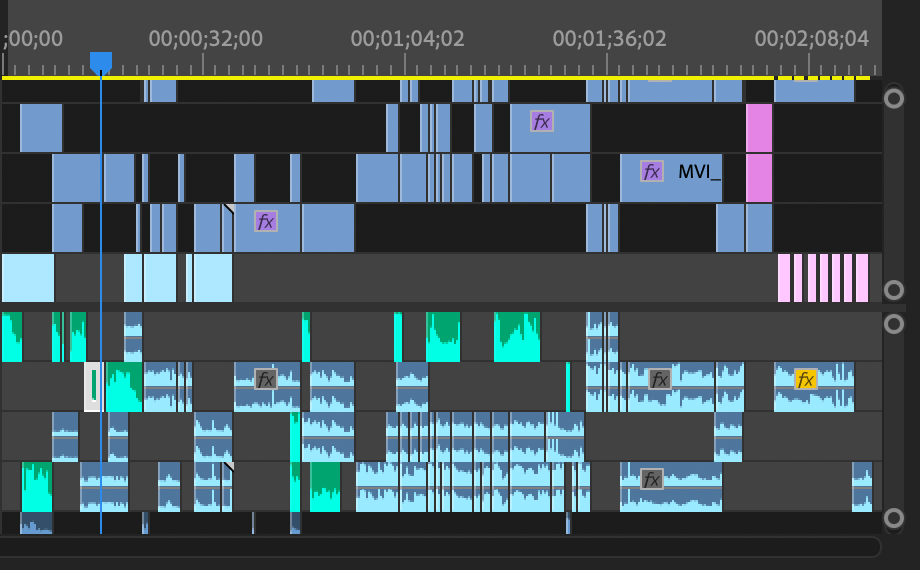
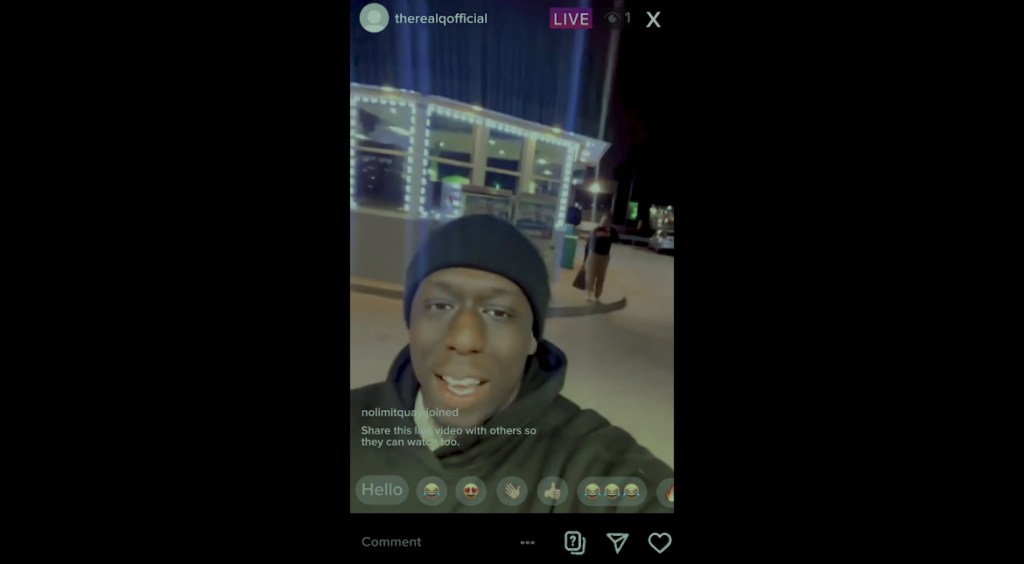
So, back to the editing. I always begin my editing process by sifting through the footage. It helps me orient myself since it’s my first time seeing it all. From there, I start with the section that I’m most excited about working on. That’s the strategy lol. In the case of Blue Kalypso, I started with the beginning, mainly because I knew it wouldn’t require as intricate of an edit as the middle and end sections. The intricacies lie in the fact that I would have to frequently switch between the “live video” and recorded video segments. We’ll touch on this further in a lil bit.
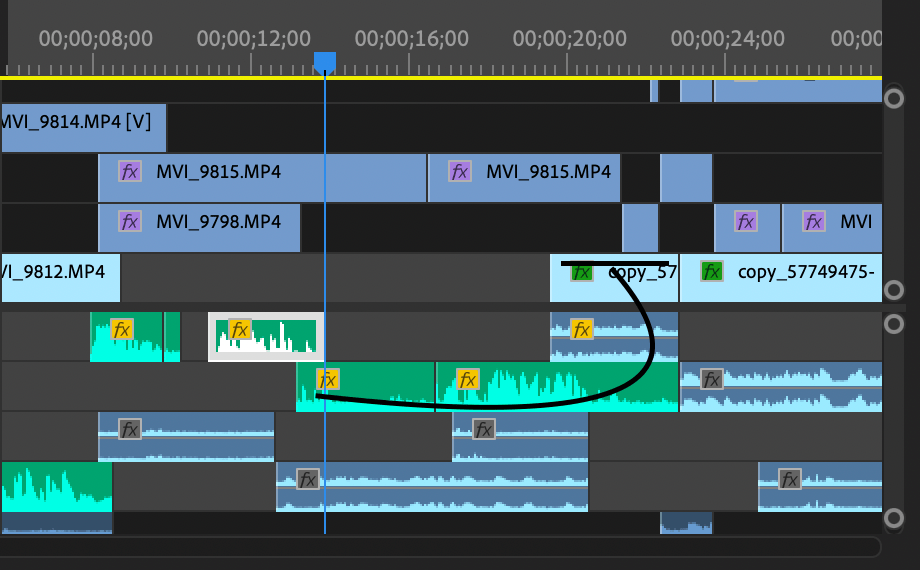
I want to pause a moment to mention I TOTALLY wish I would’ve started this entire process by color grading my footage. It would’ve saved me so much time as I had to manually match each clip’s color grade to the other. There’s probably a way to copy edits in Premiere, but I was definitely unaware of that at the time. After sifting through the footage and deciding which section I’d start with, I went through and chose the best shots from each section, placing them in chronological order. From there, I repeated the process for each section. I do several rounds of cuts, with each one getting progressively more detailed.
My Use of the “J” Cut
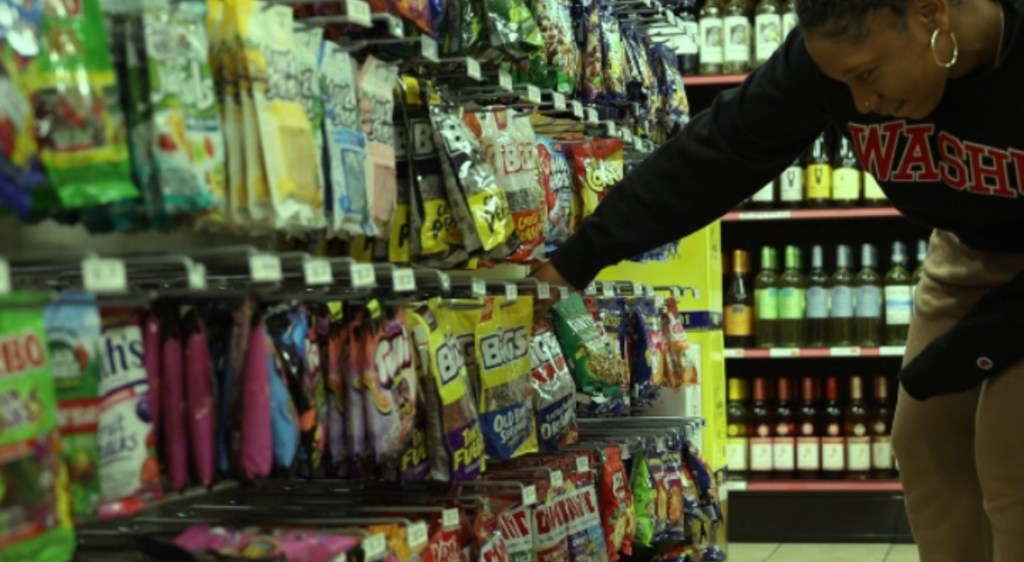
I LOVE me a good J cut. Reason being that it allows you to introduce the next scene or situation as you reside in the current one. It builds anticipation, familiarizing your audience with what’s to come and avoiding the sudden “jump-cut effect”. That could be useful in some cases, but not in this story. My favorite us of the “J” cut in my film is when T, the main character, is picking out her snacks as Q spews a bunch of nothing in the background. It not only familiarizes you with his character and voice, alluding to what’s to come, but it also adds to the verisimilitude of the gas station environment. If you’d like to, circle back to the beginningof the film & listen closely to see what I mean and how that small touch makes a huge difference. I love the seamless touch a J cut can offer to a transition.
The Hard Part – Sound Decisions
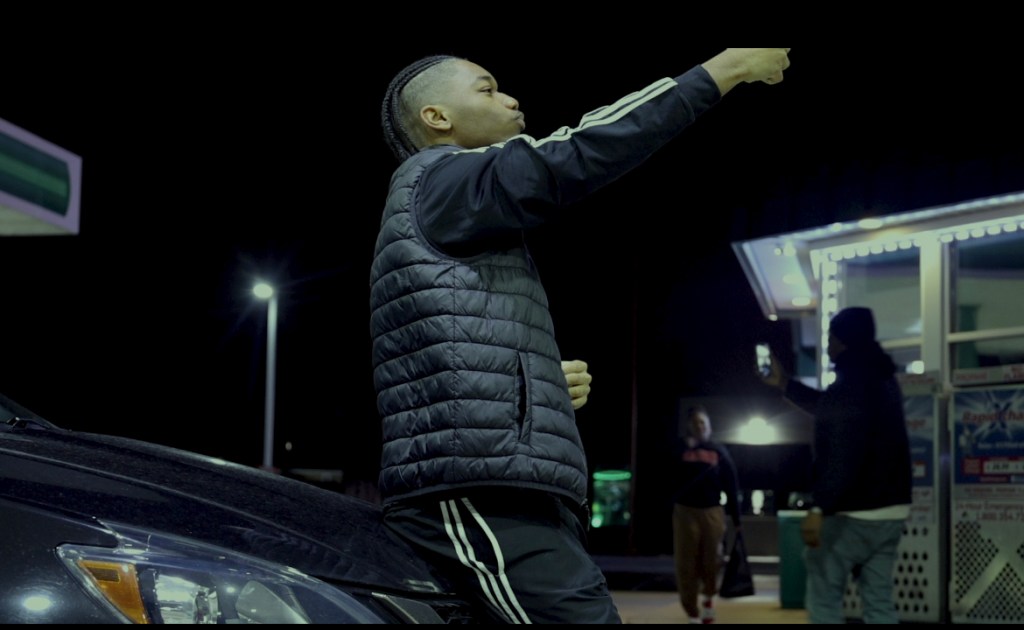
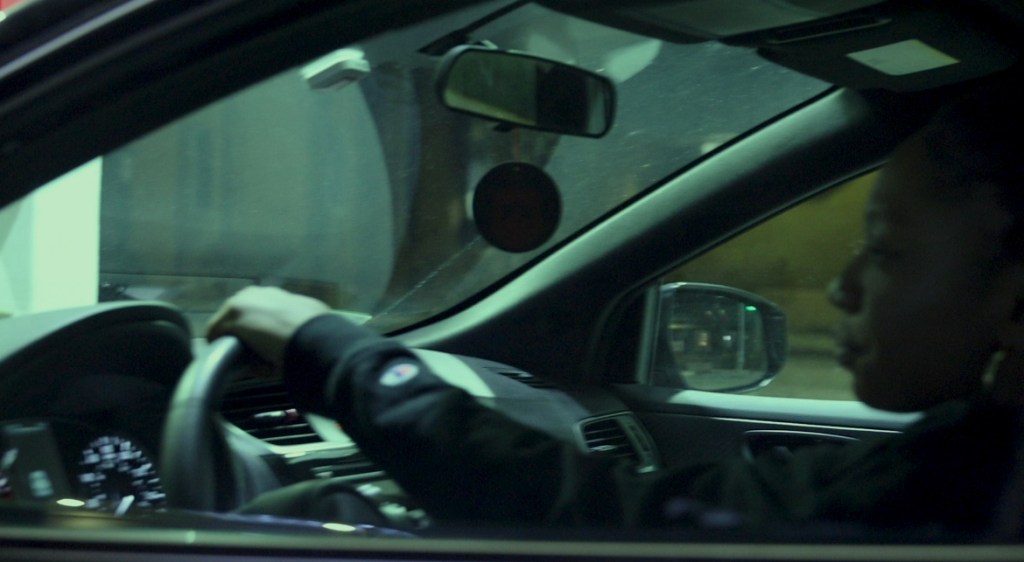
For this film, I had three different audio sources – T’s phone, Q’s phone, and the external mic that I attached to my camera. The most difficult/tedious part of the entire editing process was assessing the environments and actions that occurred in a given shot and allowing that to inform my decision as to which audio source I’d pull from. Many moments of the film have audio from all three sources woven together. If you go back to the scene where T walks outside and heads to her car, take note of the audible changes in distance and how that makes you feel. Now, if you can, try to imagine how a closer or further distance in their place would make you feel. I went through that process over and over again until I landed on what felt most realistic. When editing, I find it imperative to tap into my senses. It has to feel right. One alteration can completely change the tone through which your message is received.
Lessons Learned
The NUMBER ONE lesson I learned through the process of editing this film, is to color grade my footage BEFORE making any major cuts. I get a shiver down my spine every time I think about having to manually input the numerical values of the color grading aspects for every. single. clip. Oh my goodness. Other than that, I found the experience of editing a narrative to be extremely fun and I now feel like I can do anything lol. It’s only up from here!
I hope by providing some insight into my editing process, I’ve inspired/encouraged you as you embark on your journey. Let me know if you have any questions and please share your takeaways in the comments! Talk to you, soon!

Leave a comment